
Anticipation
Katie Byrd

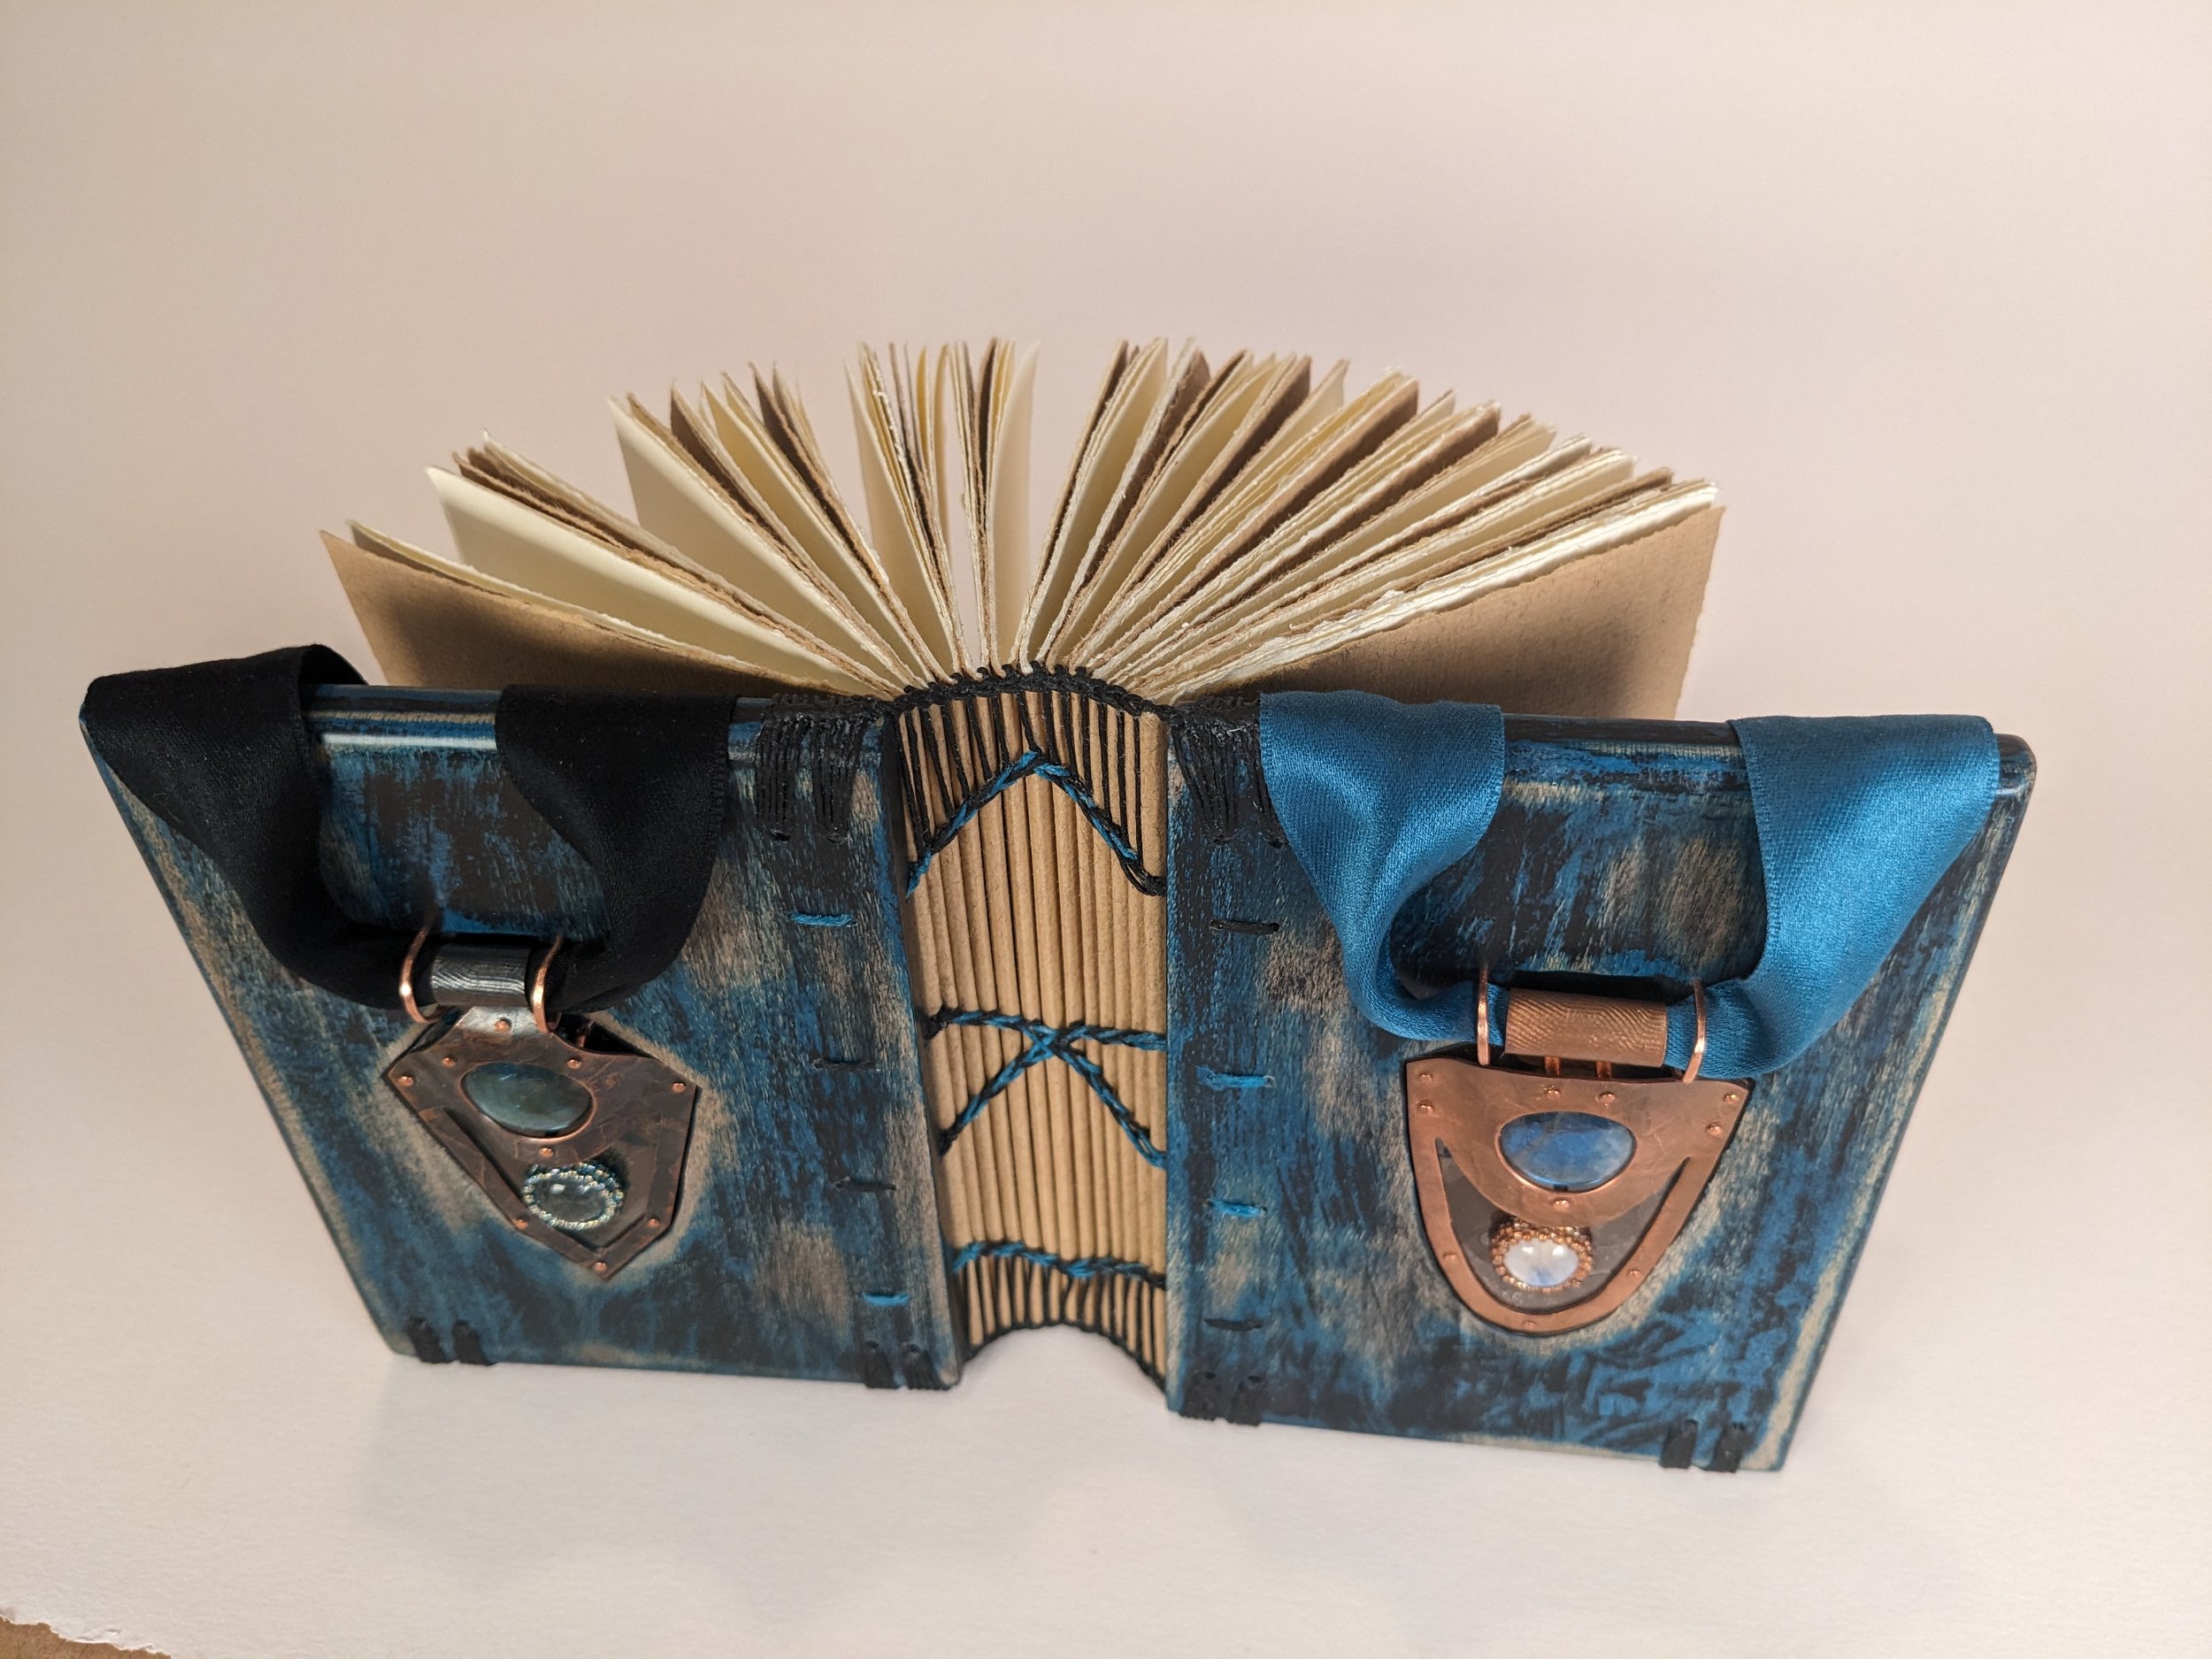
Anticipation, artist's book, 5 1/8 x 3 3/4 x 2 1/2 inches (closed). Full materials list: Copper, liver of sulfur, Baldwin’s patina, Renaissance wax, natural mica, labradorite, moonstone, natural black rutilated quartz, glass beads, Fireline thread, alcohol ink, shellac ink, cotton ribbon, sycamore wood, Milk paint, Paper: Mohawk Superfine Text (118gsm), Endpapers: Hahnemuhle Ingres Antique (110gsm), Shoe polish, waxed linen thread, cotton/poly thread
“That’s so scary because it’s so easy to mess up.”
Interview by L. Valena
August 5, 2023
Let's start from the top. Can you please describe the prompt that you responded to?
I was given a song called Hungry For More. The first time I listened to it, I took a bunch of notes. It’s like a singer-songwritery-type of song. I just remember getting this really warm, happy feeling from it. It describes what seems to be a blind date. The person is at a restaurant and they're waiting and anticipating, excited. And then the person they're supposed to meet arrives and it goes really well. They're connecting, they share a kiss; it was a very warm-fuzzies kind of song.
What were your first feelings and thoughts about that?
In my notes, I wrote down “possibility” and “connection,” “flowers in your hair,” “mesmerizing.” I was sort of picking up on a certain color palette from the song, but then I had no idea where I was going to go with it. I don’t do anything with flowers! I was trying to think of what I could do, and there's definitely some strong imagery from the song. I was picturing the restaurant, the tablecloth, the person’s glasses… I considered painting a picture of this scene, but I didn't want to prescribe who these people were. I liked the idea that it could be anyone, that anyone could picture themselves on this date.
That first three hours thinking “What am I going to do?” was the hardest part for me because I don’t typically work from a prompt. It's usually like, “I'm doing this thing and what would look good? Let me root around in my box of stuff and see what I want to use on the book cover.” Starting with the idea was really tough.
So how did you get started?
Lately I've been taking a lot of jewelry classes, and I also really like bookmaking, so I was already thinking along those themes. I landed on jewelry, with this idea of adornment, like you're going on a date. And what if there's a piece of jewelry for each person? I realized that if I made pendants, I could put them in a book! Since the books I make typically have all blank pages, that could go with the beginning of a story, you know, something is starting. So I wanted to figure out some way to incorporate pendants into a book.

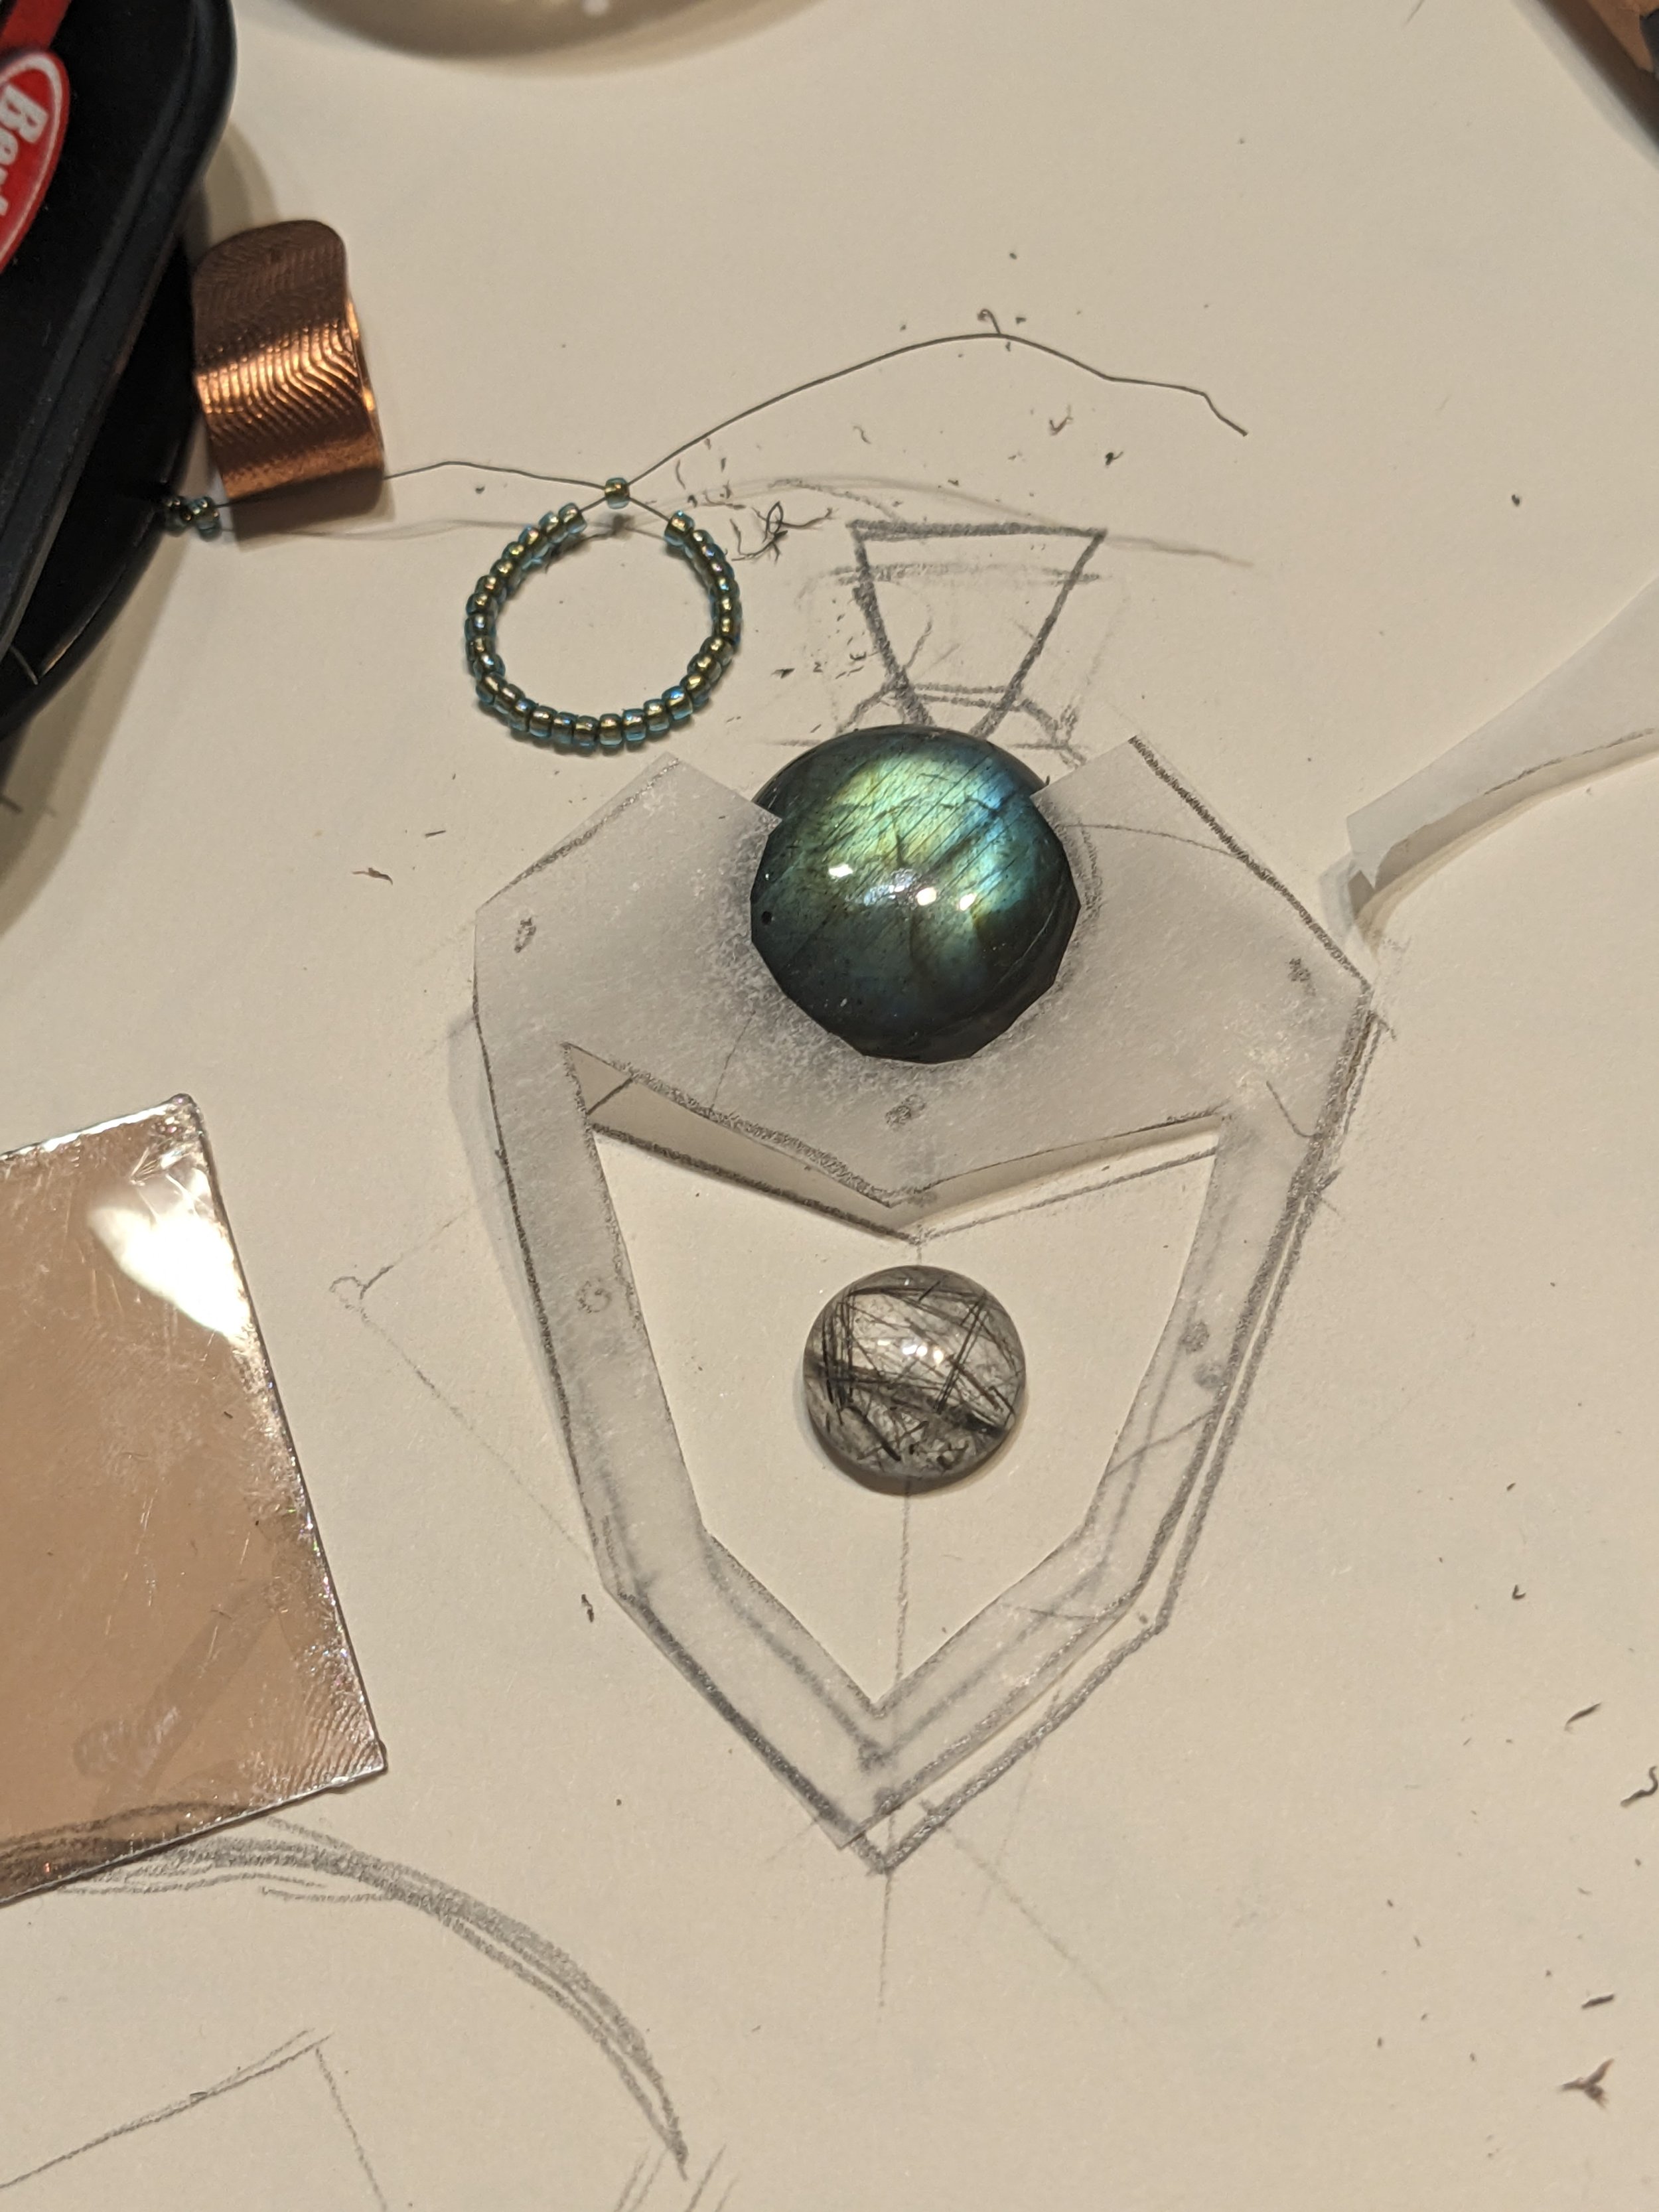
I’m a very visual person, so one of the things I did early on was transcribe the lyrics to the song as best as I could hear them so that I could read over them. There’s stuff in the song about these two people being “complementary” and “in harmony.” I found in my gemstone box these little stones that are different, but similar sizes. I haven't done too much bezel-setting with silver, but I have used tiny beads on a piece of mica to make a bezel for a gemstone on a book cover. If I did that on a pendant, you could see it a lot better than you could on the book. To design the pendants, I thought, “If I want this tiny bead on the piece of mica, and I want the bigger one in copper, how do those go together?” First, I drew the pointy one how I thought it would look good, and then the round one needed to be different but similar.
So the two pendants are two different people coming together at the beginning of the story?
Yes. And the pendants alone were my fallback. If I ran out of time, I'd just have the two pendants. I wasn't sure how they would fit on the book, and I was just going to leave that up to the future. And early on I also thought that if it had a ribbon closure, like the two tying together and that being the book closure, that could just be really cool.
It is! And I think it's so cool that this is both jewelry and a book. That’s a really interesting combination.
That was also experimental. I had notes from the last time I made a book, so I knew that basically after the covers were done, it just took like 10 more hours. [laughs] So I was going off of that estimate. But it ended up taking longer. Let's just say that when I emailed you at 5:00 in the morning that it was done, it was because I had been up that whole night.
Oh my god!
Overall it took 60 hours. I showed my parents a picture of this and my mom said, “You should sell those!” [laughs] No! I would make pennies!
Also, your binding is gorgeous, congratulations.

Thank you! I’ve taken a bunch of classes from Daniel Essig which is where the main idea of the wooden covers and the shape came from. But then there's also a local artist Anne McLean who does really decorative stuff with her binding. I’d taken a class with her like a decade ago and I had this packet from back then. I thought, “Okay Katie, it's 2:00 a.m. Can I merge the way I need to attach to these wooden covers like I’m used to, with doing the literal opposite direction stitch, according to her packet, to get these corners and this X?” And it worked on the first try! YES!
That's amazing!
I wanted to do a little bit of experimentation. I didn't want to just make another book like I've always made. I thought that this X would go with how the necklaces intertwine. What was really hard to get in the pictures is just how clear the mica is in the necklaces.
Wait, those are clear?
[whispers] Yes!
[astounded] Oh my god!
Yeah, and then the necklaces are just sitting in there. The only thing that holds them on are these copper loops that are right up with the ribbon. They’re like little windows, and I put some alcohol ink in there to give it a little bit of color.
That is so cool! Wow!
Most of the time went into the pendants because the mica is kind of fragile. I have all these rivets, and I’m lining them up, and then I'm filing the edges of the mica around the copper, and I've got to have wire in there so it doesn't shift, and I can't file once the rivets are in because that'll take off the finish that I put on the copper. There are just several layers of poking stuff into the necklace and trying to hold it together. The rivets were the last step.
I’d intended it to be open like this. One thing that had been mentioned during one of the book classes, but I'd never tried, is doing the same endband stitch on the book corner. Otherwise, it's uneven on the bottom. So I thought, “Oh, it'll take me this long to do a book binding,” but then I have four more corners I've got to do.
The level of finish and your craftsmanship are really impressive. And the fact that you accomplished this in two weeks is pretty amazing!
I don't work full-time. I have a four-day week. But I realized after the fact that this was basically just four hours short of me working twice my job for two weeks! [laughs] Whoops! I'm not great at estimating time. At the start, I thought I was going to have it finished early.

I have the same problem. My work is really labor-intensive too and I forget that somehow. How did you make these wooden covers?
These are actually sycamore, which I hadn't used before. They were a little bit warped, but I knew that by the end it wouldn't be super noticeable. The first step is always drilling out the holes along the spine. What you see is just a stitch there, but what you can't see are the diagonal holes that are drilled so that instead of having thread pull over a corner of a book, it's going inside. That’s so scary because it’s so easy to mess up. In the classes, he’d say, “You just have to practice.” I re-measured everything onto a practice board and I did it ten more times. I was feeling so loose and easy and they were perfect, so then I immediately picked up the actual cover and yeah, they were not perfect. Once I found the ribbons for the necklaces, I realized I also had milk paint in that color. So I kept the paint darker on the spines to disguise any hole issues. I used a tiny router attachment for my flex shaft that’s meant for guitar inlay to create the recesses for the necklaces.
If you were displaying this somewhere, how would you display it?
So far, I have it open on my little bookshelf. For like the main view, I really like having the ribbons tied together in a square knot in the center and then just flowing around. But I realized that there are so many more possibilities than I even envisioned. My friend asked if the ribbons are bookmarks and I thought, “They could be!”
Some of the other books that I've done have mica pages and there’s a lot going on in the book. In this, there's the paper. You could, you know, write things in the book, but you could also just stand it up. Even though the necklaces do close it really nicely, I like seeing them side-by-side. I really wanted to show equality between the two pendants. Even though one is on the back cover, if you're looking at it from left to right, that's the first one that you see. So I like having it open and seeing both pendants at once. The other part I like about having it open is that you really can see through these little mica windows.
I think it's interesting to think of this piece as the beginning of a relationship because you’ve worked so hard to make this feel effortless. It’s like that tension in early relationships, when both people are trying hard to put their best foot forward, but you also have to try to be your most authentic self.
That also comes through in the song a little bit. There's a line that says, “Anticipating my mystery guest, I took off my glasses.” This person doesn't want to be seen wearing their glasses, like they just want to dazzle the person with their eyes.
Now that you're on this side of this experience, what is your advice to someone else approaching this project?
Definitely get started early. My tendency is to procrastinate, and I’m really proud of myself this time because I didn’t. For example, I did a couple of week-long classes at Pocosin. For one of them, I made a book, and I know that in that week, I pulled one all-nighter and several late nights. So from the beginning of this, I said, “I am starting this TODAY.” I kind of knew that it would be intense. I cleared the whole rest of my schedule because I knew that I would just have to really get after it.
That first week, I spent a little less time in the studio, but then in the second week things got late. I tried at first to say, “Okay, I'm going to bed at midnight. Nice and early. I don't want to burn myself out.” But then toward the end I wondered, “What are the consequences if I ask for an extension?” Nope, it has to happen in two weeks and against all odds it'll come together. And it did. And I'm just so delighted.
Call Number: M78MU | M80VA.byAnti

Katie Byrd loves making things. She lives in Raleigh, North Carolina. Her current interests include jewelry, books, embroidery, and beadwork, though if you looked in her craft room, you’d also find supplies for woodworking, sewing, collage, drawing, and more.